Install and Activate WordRake for Outlook
Thank you for purchasing WordRake. Here's how to install/update WordRake, activate your new license, and start editing with WordRake.
Step 1: Install WordRake
a. To get started, close all emails and quit Microsoft Outlook.
b. Click the orange button (below) to download WordRake for Outlook.
c. Double-click the download "WordRakeOutlookInstall" file to begin installation.
d. Once installation is complete, open Microsoft Outlook and either begin a new email or reply to an existing one.
e. The WordRake tab will be visible in your open email message. Click on the WordRake tab above the ribbon.
/WR%20v5%20Ribbon%20WIN%20Outlook%20365_WR%20Tab.png?width=756&height=263&name=WR%20v5%20Ribbon%20WIN%20Outlook%20365_WR%20Tab.png)
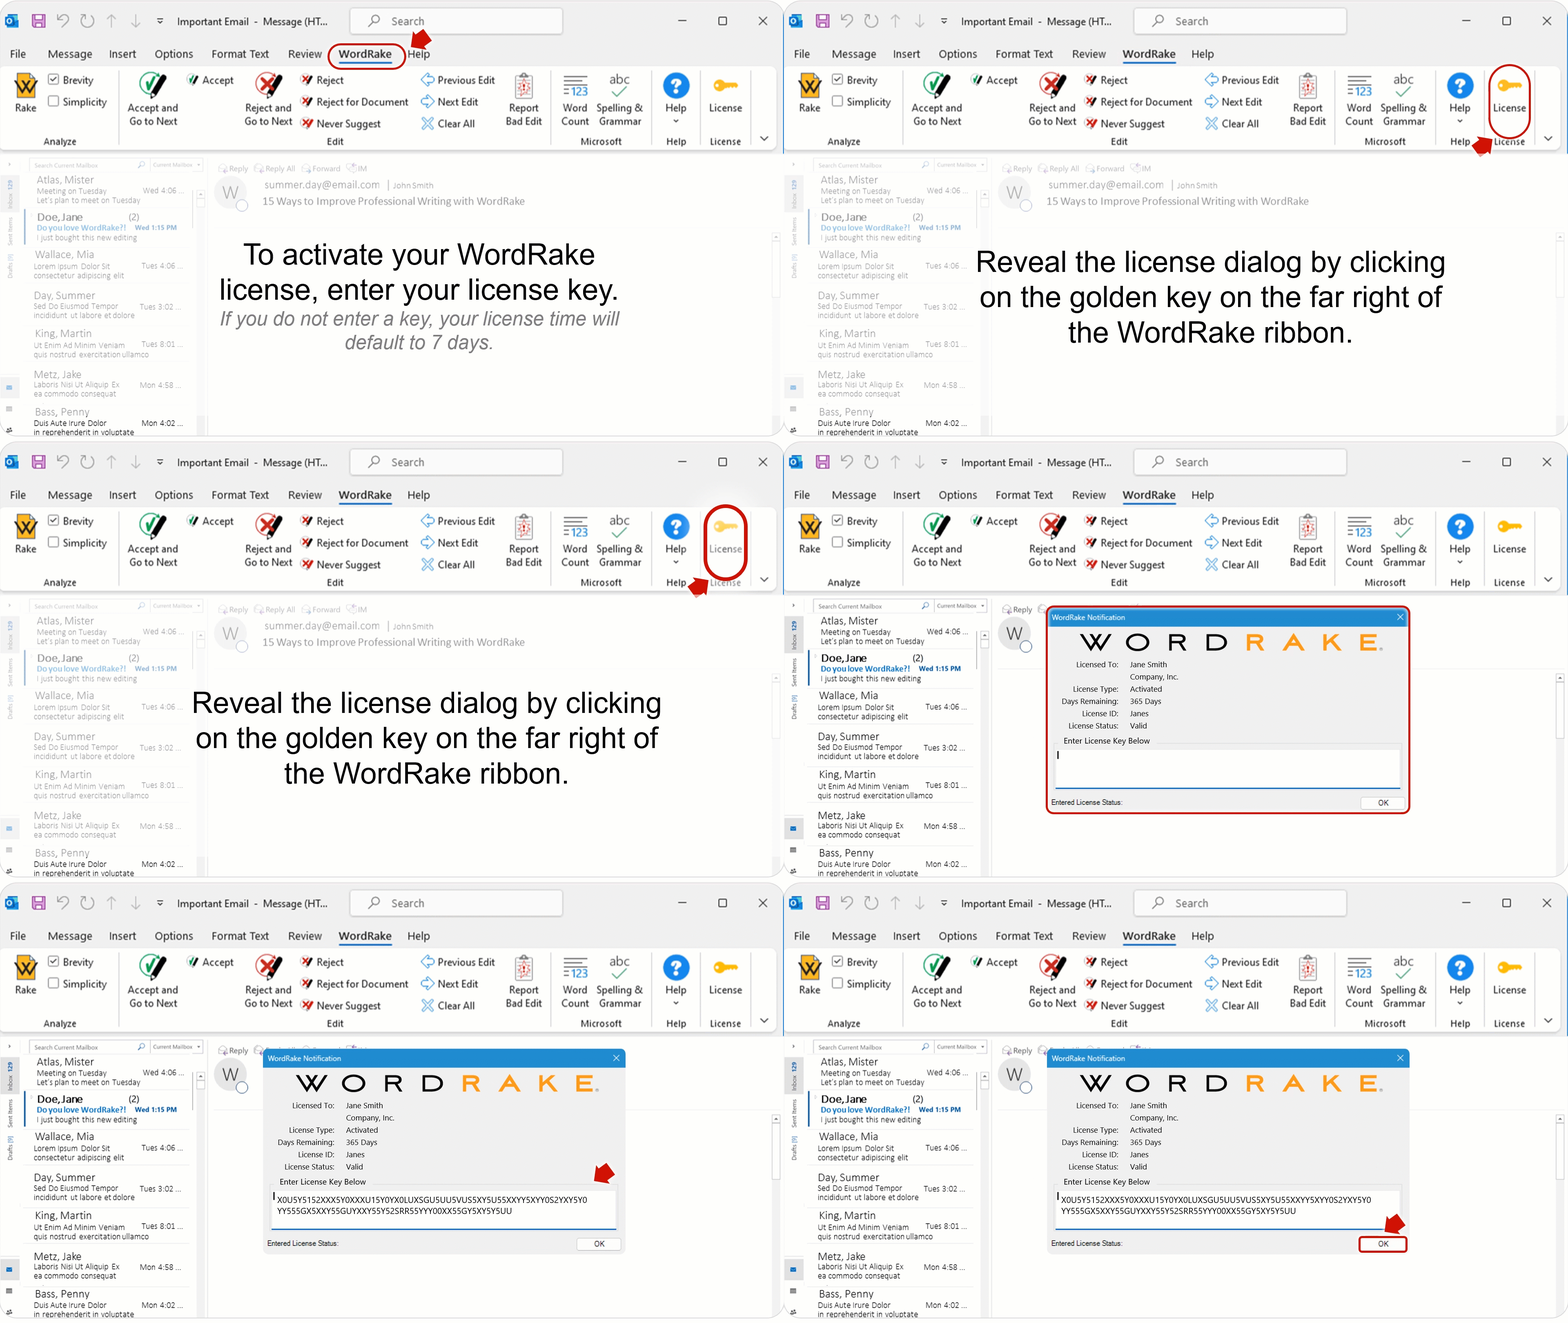
Step 2: Activate Your New License
(Important: You must complete this step for your new license to take effect.)

b. Earlier, you received an email from us. It includes your license key, and you’ll need it to activate your license. The email should look like this:

c. Refer back to your email for the license key and copy and paste the license key into the space provided. It should look like this:

Step 3: Editing with WordRake
a. When you’re ready for feedback, select Brevity and/or Simplicity to determine which types of suggestions to receive.
/WR%20v5%20Ribbon%20WIN%20Outlook%20365_Brev%20or%20Simp.png?width=756&height=263&name=WR%20v5%20Ribbon%20WIN%20Outlook%20365_Brev%20or%20Simp.png)
b. Next, click the Rake button and watch WordRake analyze your document and suggest improvements.
/WR%20v5%20Ribbon%20WIN%20Outlook%20365_Rake%20Button.png?width=756&height=264&name=WR%20v5%20Ribbon%20WIN%20Outlook%20365_Rake%20Button.png)
c. In under one minute, WordRake can make hundreds of editing suggestions that appear in the familiar track changes form. Your suggestions will look like this:

d. Use the WordRake Accept and Reject buttons to keep the edits you like.
/WR%20v5%20Ribbon%20WIN%20Outlook%20365_Accept%20Reject%20Next.png?width=756&height=263&name=WR%20v5%20Ribbon%20WIN%20Outlook%20365_Accept%20Reject%20Next.png)
It’s that easy. Have questions? Please contact support and they'll be happy to help!


